
Supported Systems
• PC1555 • PC1616 • PC832 • PC864 • PC1808 • PC1832 • PC1864 • PC5005 • PC5010 • PC5015 • PC5020
⚠️
For Olarm PRO installation guides, visit our knowledge base.
📦 What's in the box
Olarm MAX
Internal Power Supply Lid
Super Capacitor With A JST Connecter *Model Dependent
4x Wall Plugs & Screws
2x Enclosure Locking Key
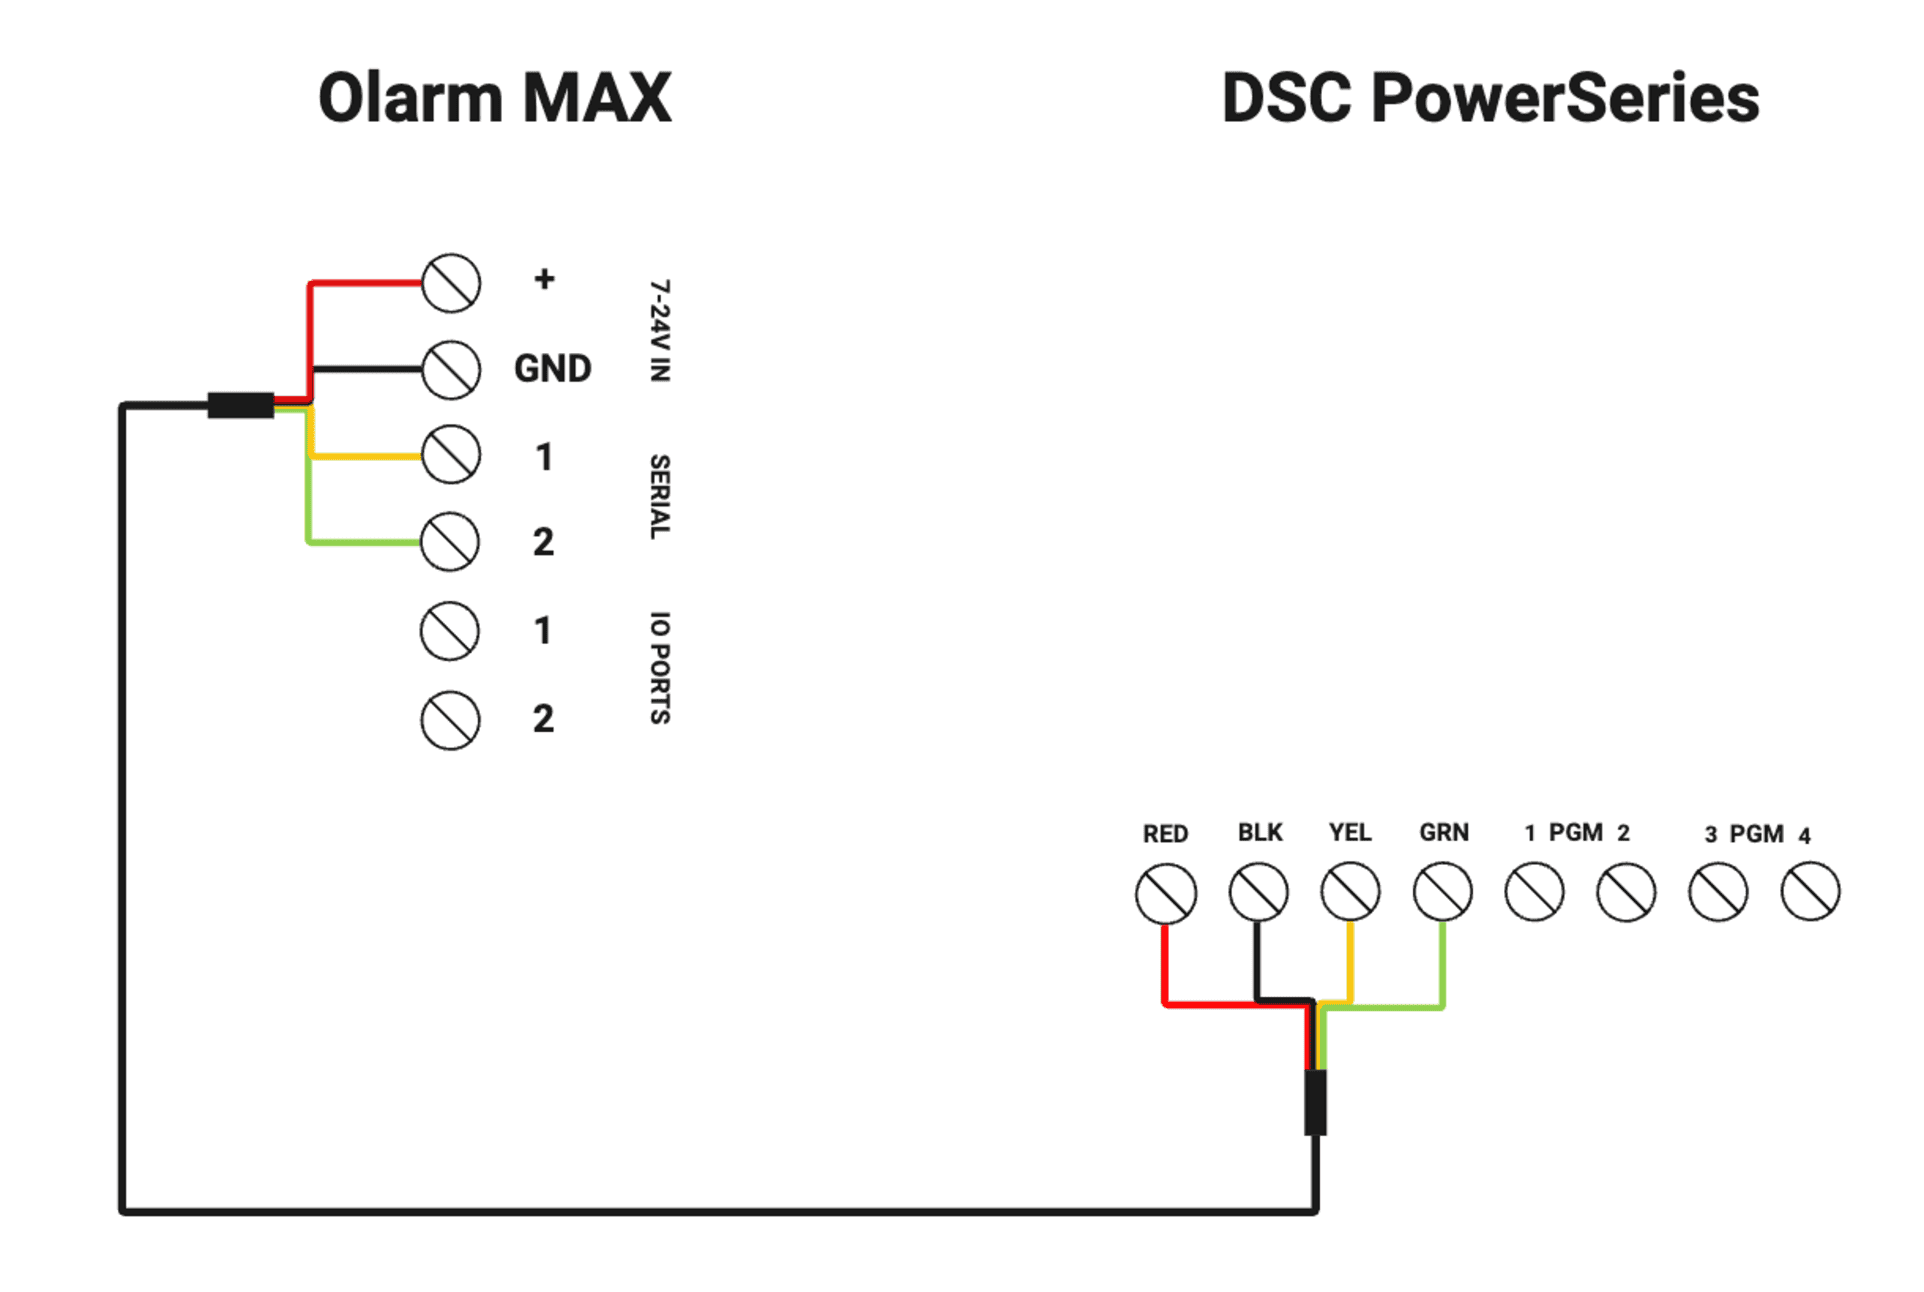
Reversible Peripheral Cable
🛠️ Installation tools required
Drill with a 5mm bit
Phillips-head screwdriver
Flat-head screwdriver
Wire stripper or side cutters
Cable for peripheral wiring (4 Core or 6 Core Comms Cable, 2 core Twin Flex or Ripcord)
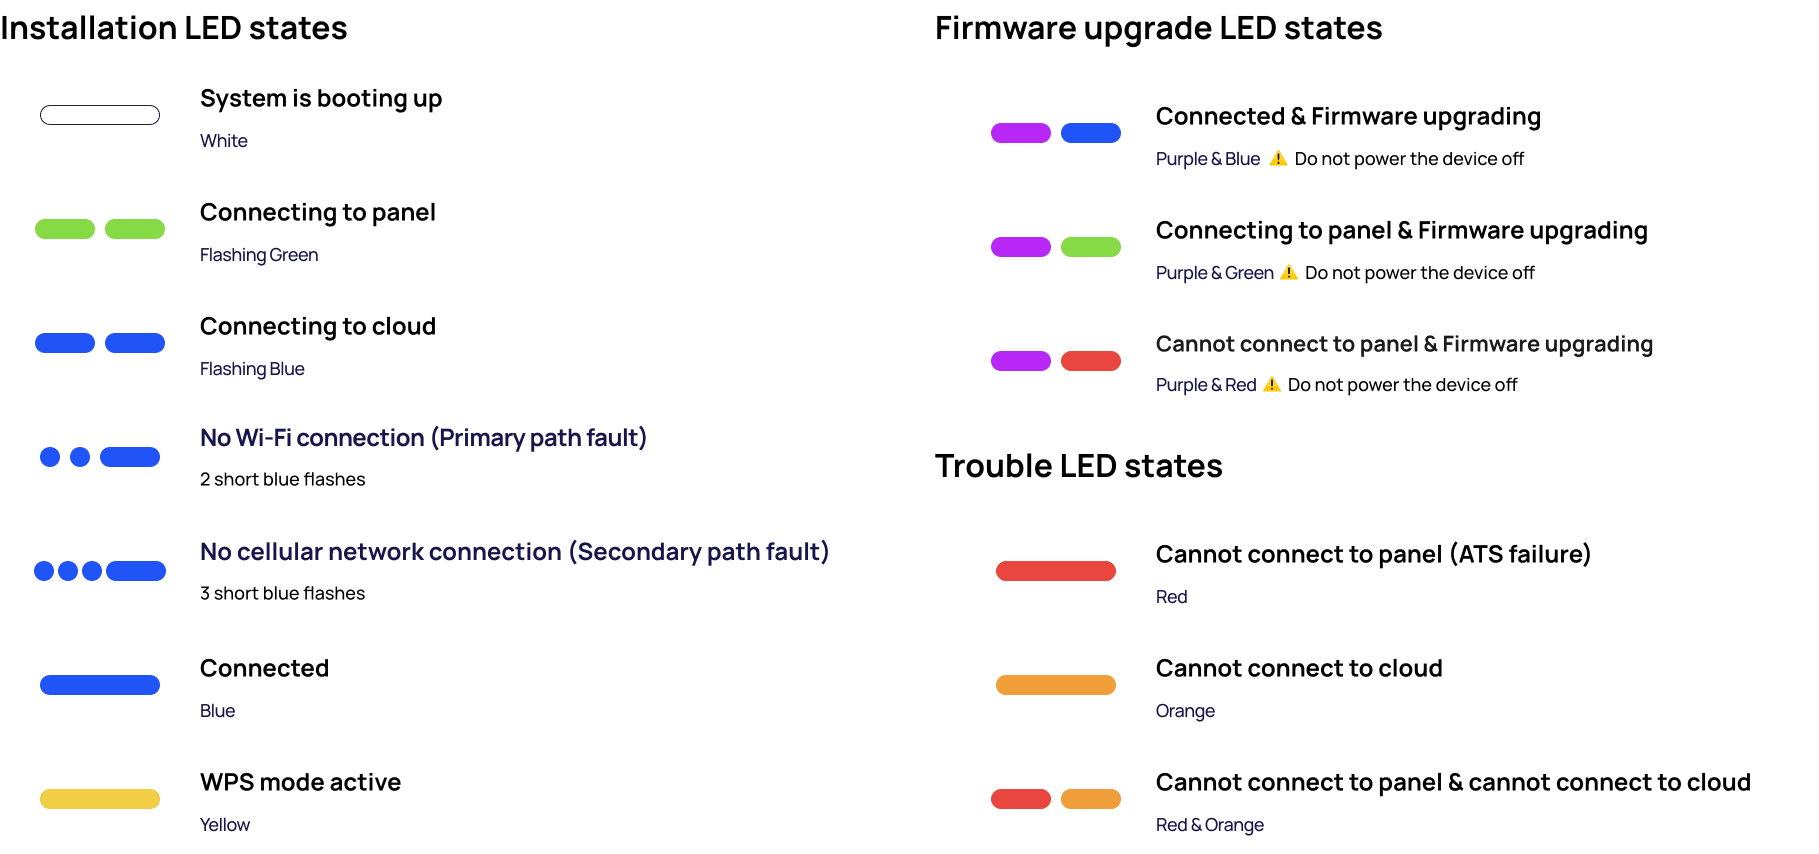


Troubleshooting LED States

Mount the Olarm MAX
Follow the diagrams below to mount the Olarm MAX.
Using the screws and wall plugs provided, mount the backplate to the flat surface as shown in the diagram below.

Mounting the backplate to the surface
Place the Olarm MAX flat against the mounted backplate and slide the enclosure down to click into place

Mounting the device to the backplate
Using the locking key, apply force to insert the mechanism into the key hole until flat against the enclosure, which is indicated by two clicks.
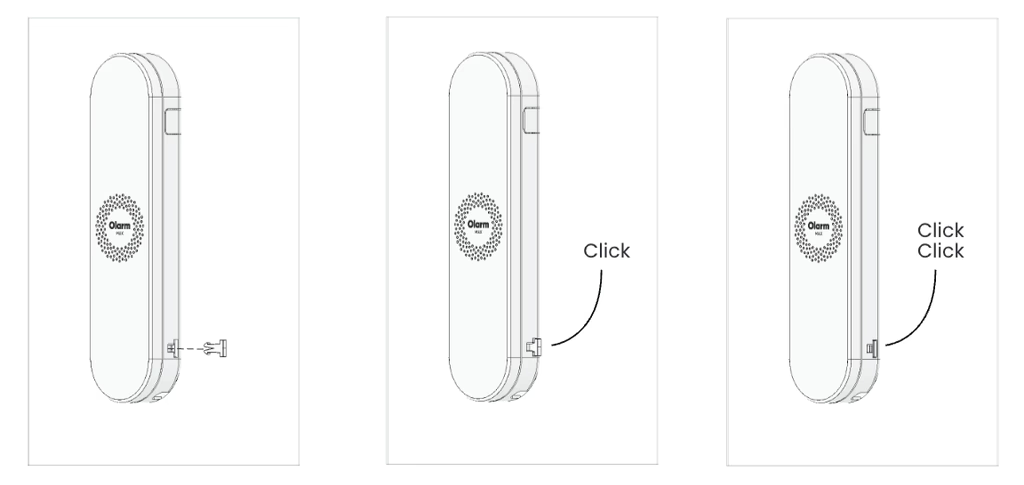
Locking the Olarm MAX shut
Note:
Do not mount the Olarm MAX inside or against the alarm system enclosure, as this will hinder its connectivity capabilities.
Do not mount the Olarm MAX near any other communication equipment, as they will inter with each others abilities to transmit signals.
Utilise a non-metal enclosure should you mount the Olarm MAX outdoors.
The maximum distance between Olarm MAX and Alarm System is 3 metres.
